Cinnamon-Vanilla Candles

Standard


Cinnamon-Candles

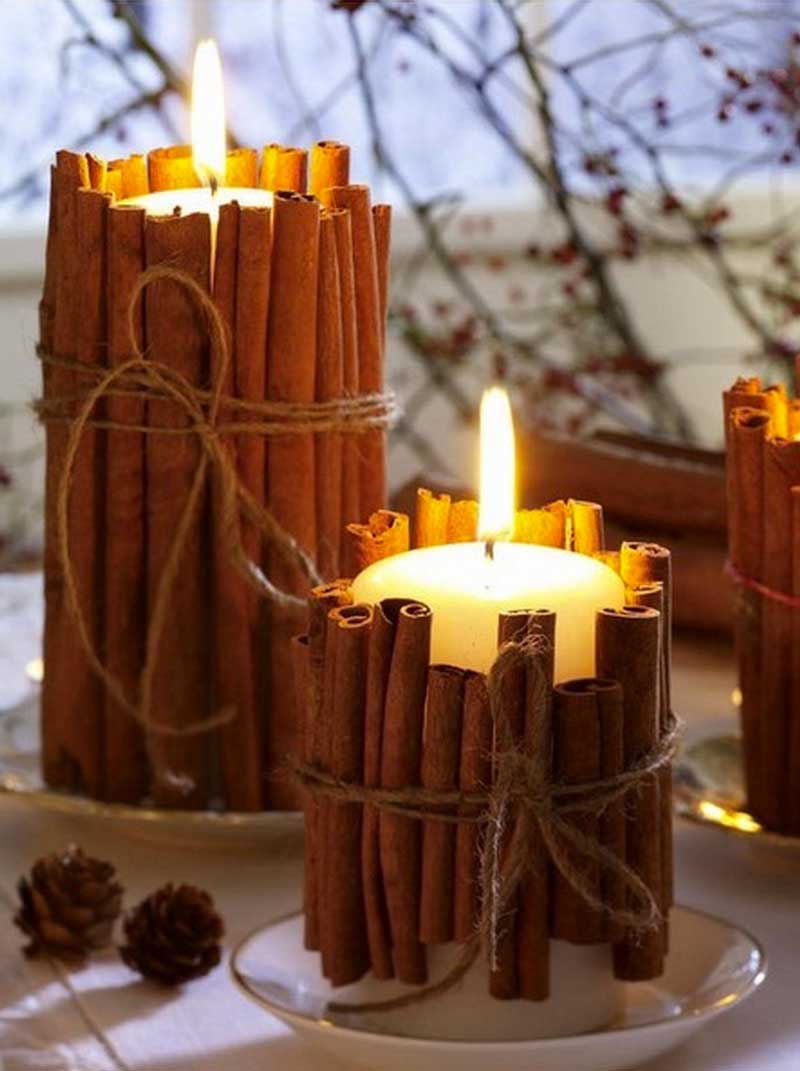
Scented candles are an easy way to give your home an aromatic ambiance makeover, but when wicks fail or wax melts unevenly, they are also an easy way to drain your bank account.  This article will teach you how to save by teaching you how to make Cinnamon-Vanilla candles by yourself and be the true DIY champion. This candle will not only smell great but it makes a beautiful decorative element for your home. As the vanilla candle warms up the cinnamon sticks, your room will be filled with the fall scent of vanilla and spices. Here’s how you can make your own Cinnamon-Vanilla candles:

Materials and tools:

  • Vanilla candles
  • Cinnamon sticks
  • Thick elastic bands
  • Twine
  • Ribbon

cinnamon-stick-candle-step-2

Step 1: Place an elastic band around the bottom of the candle. Slide it up a couple inches and make sure it lays flat with no twists against the candle.

IMG_2528

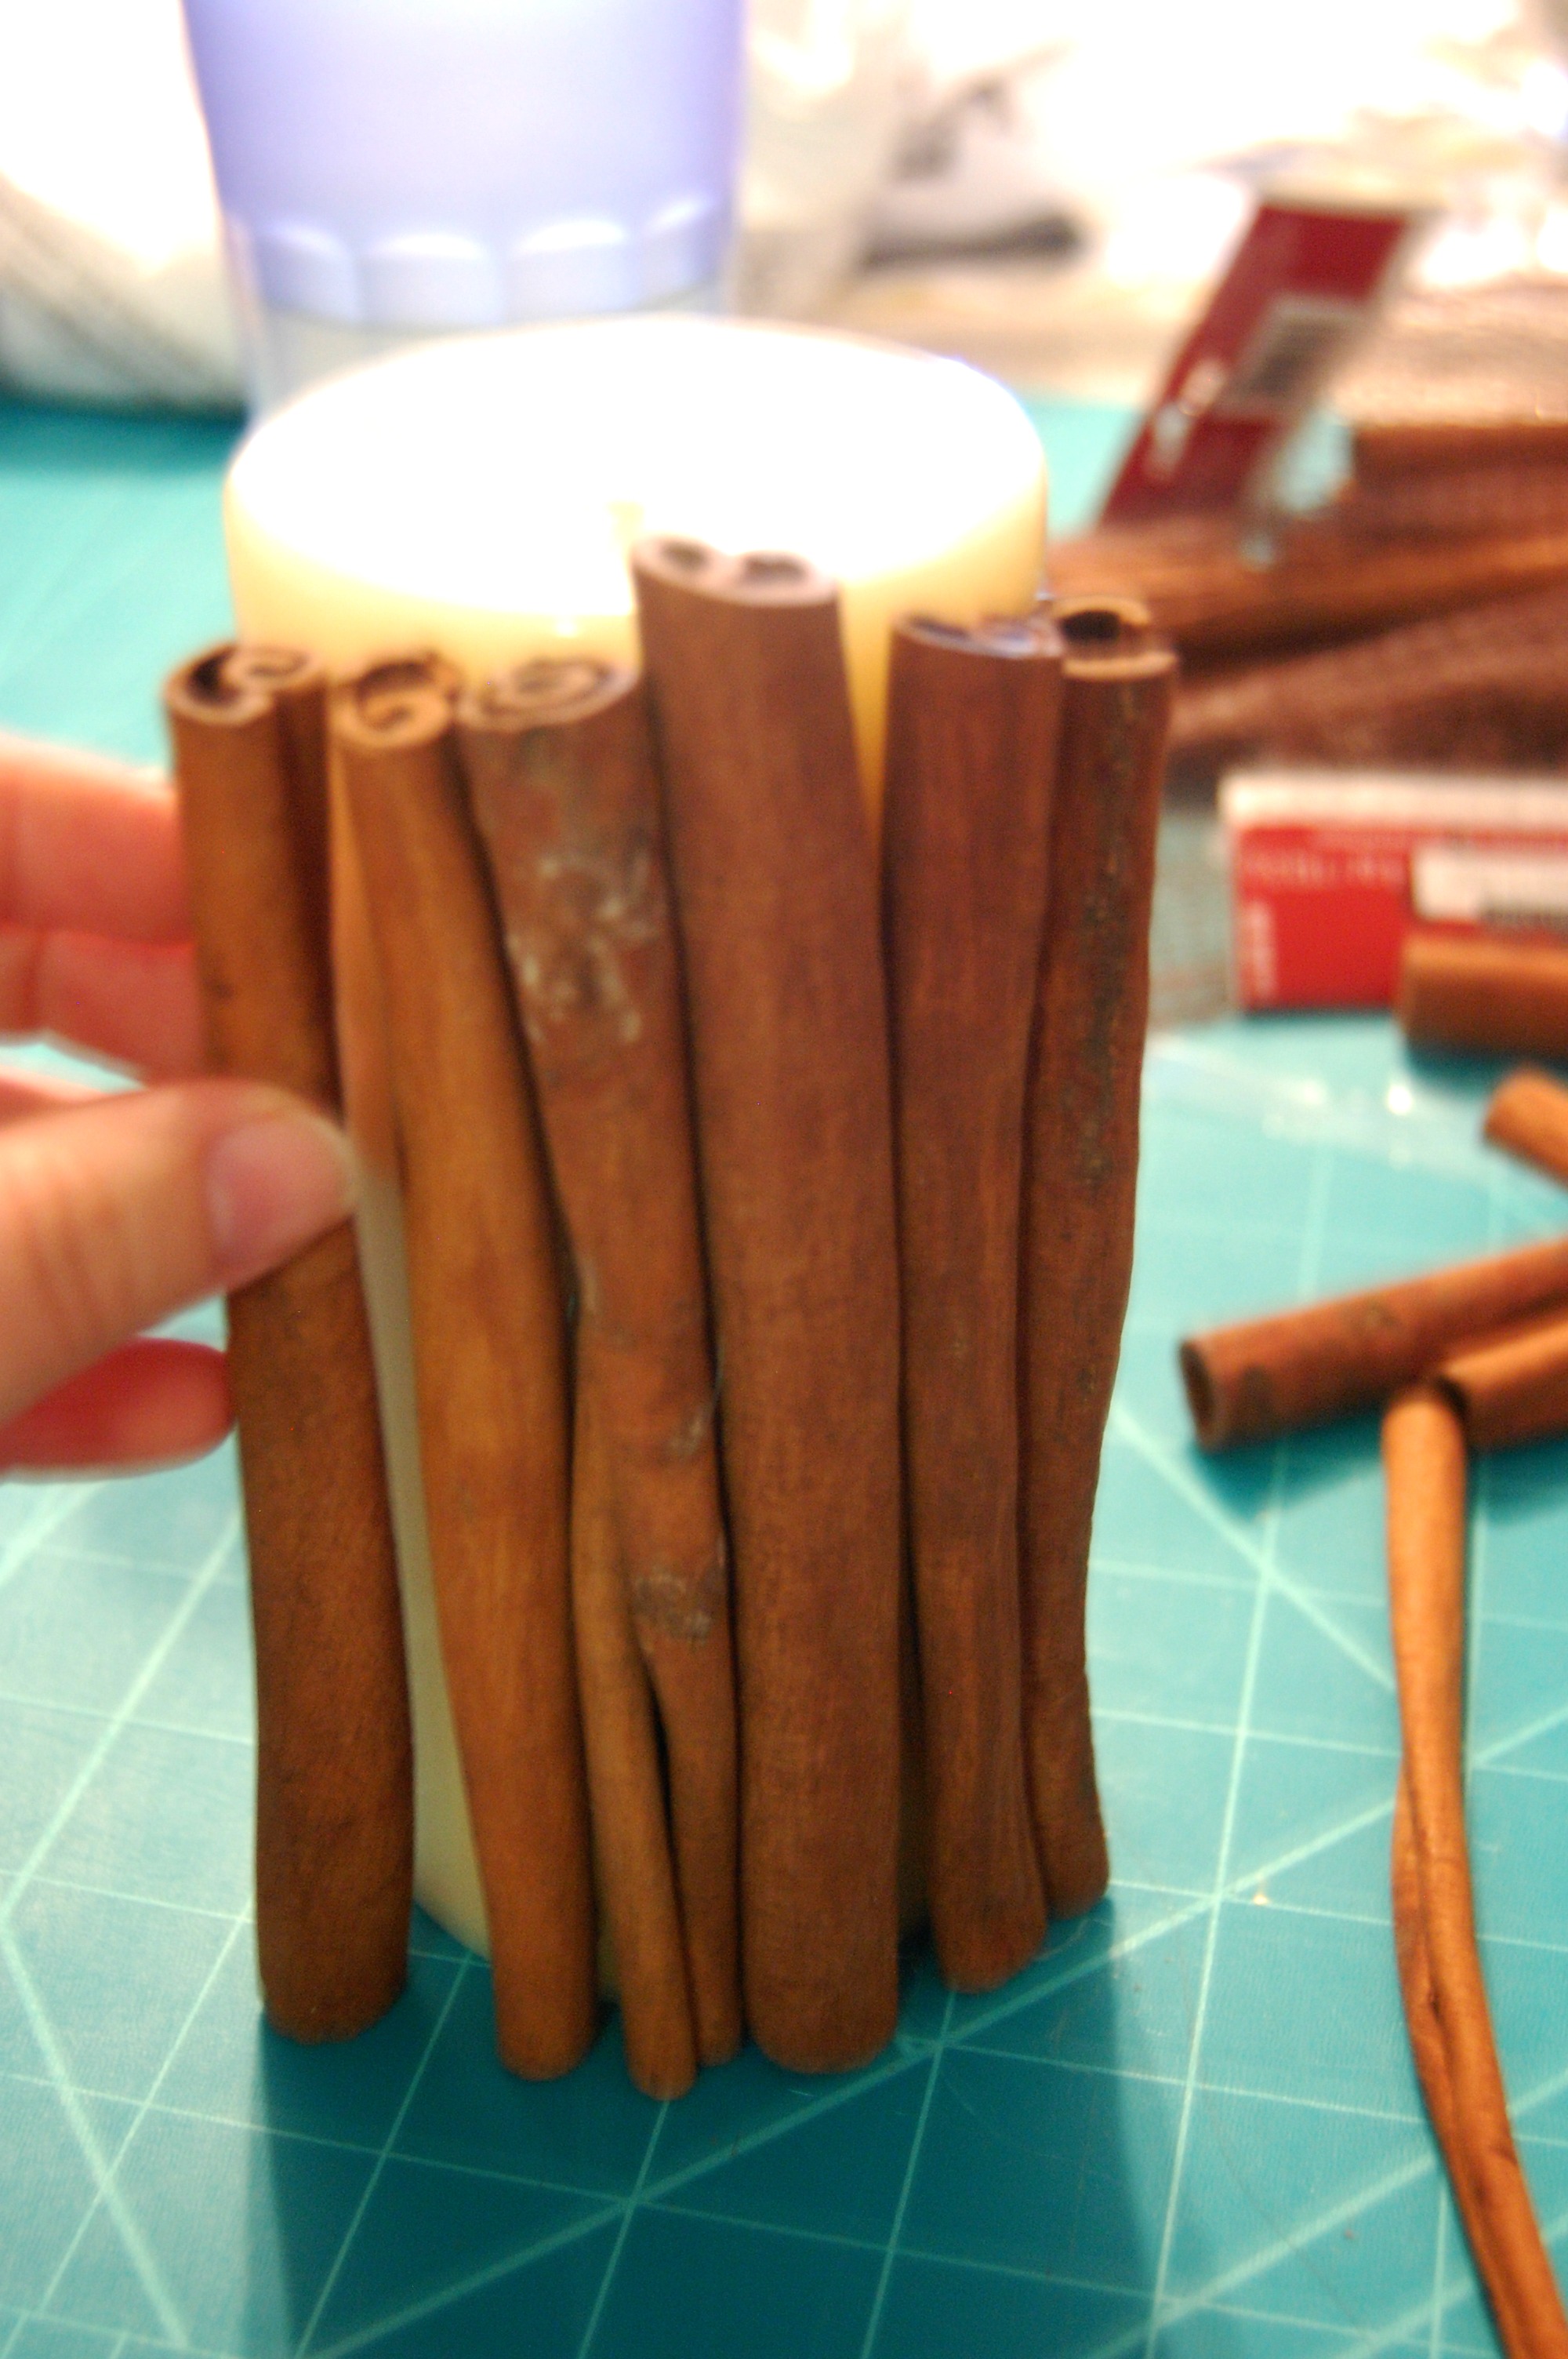
Step 2: Carefully slide in the cinnamon sticks behind the elastic band, one at a time.

cinnamon-candle-2

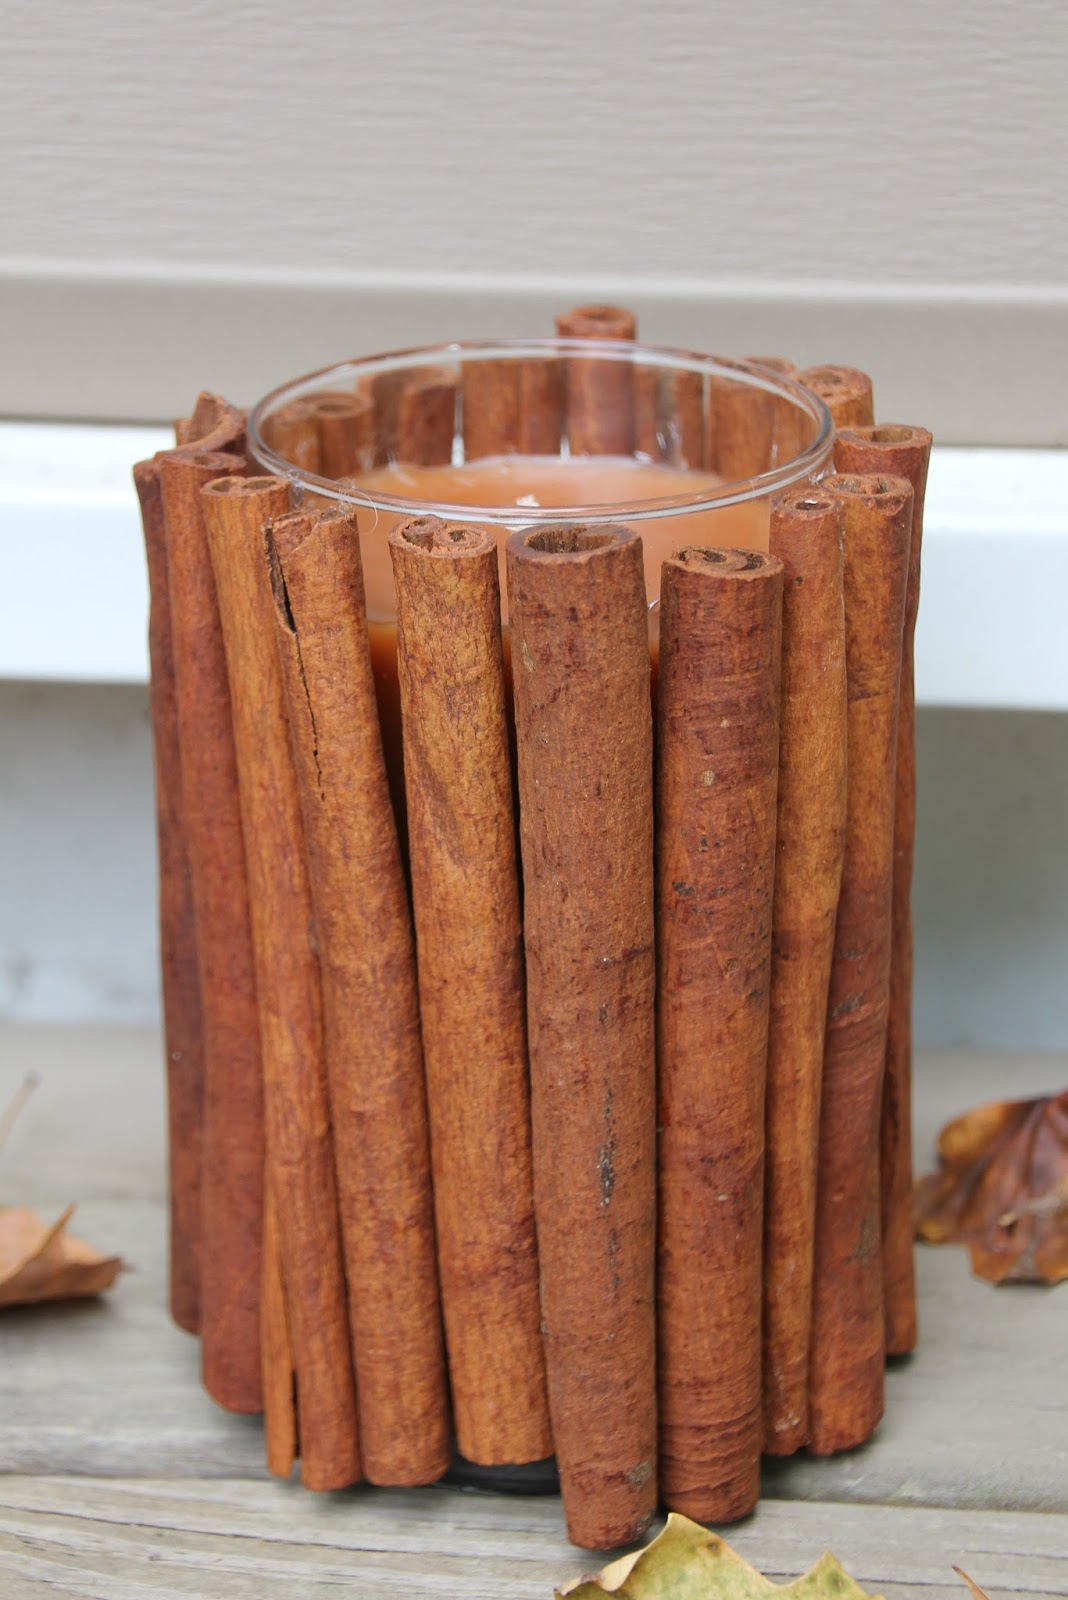
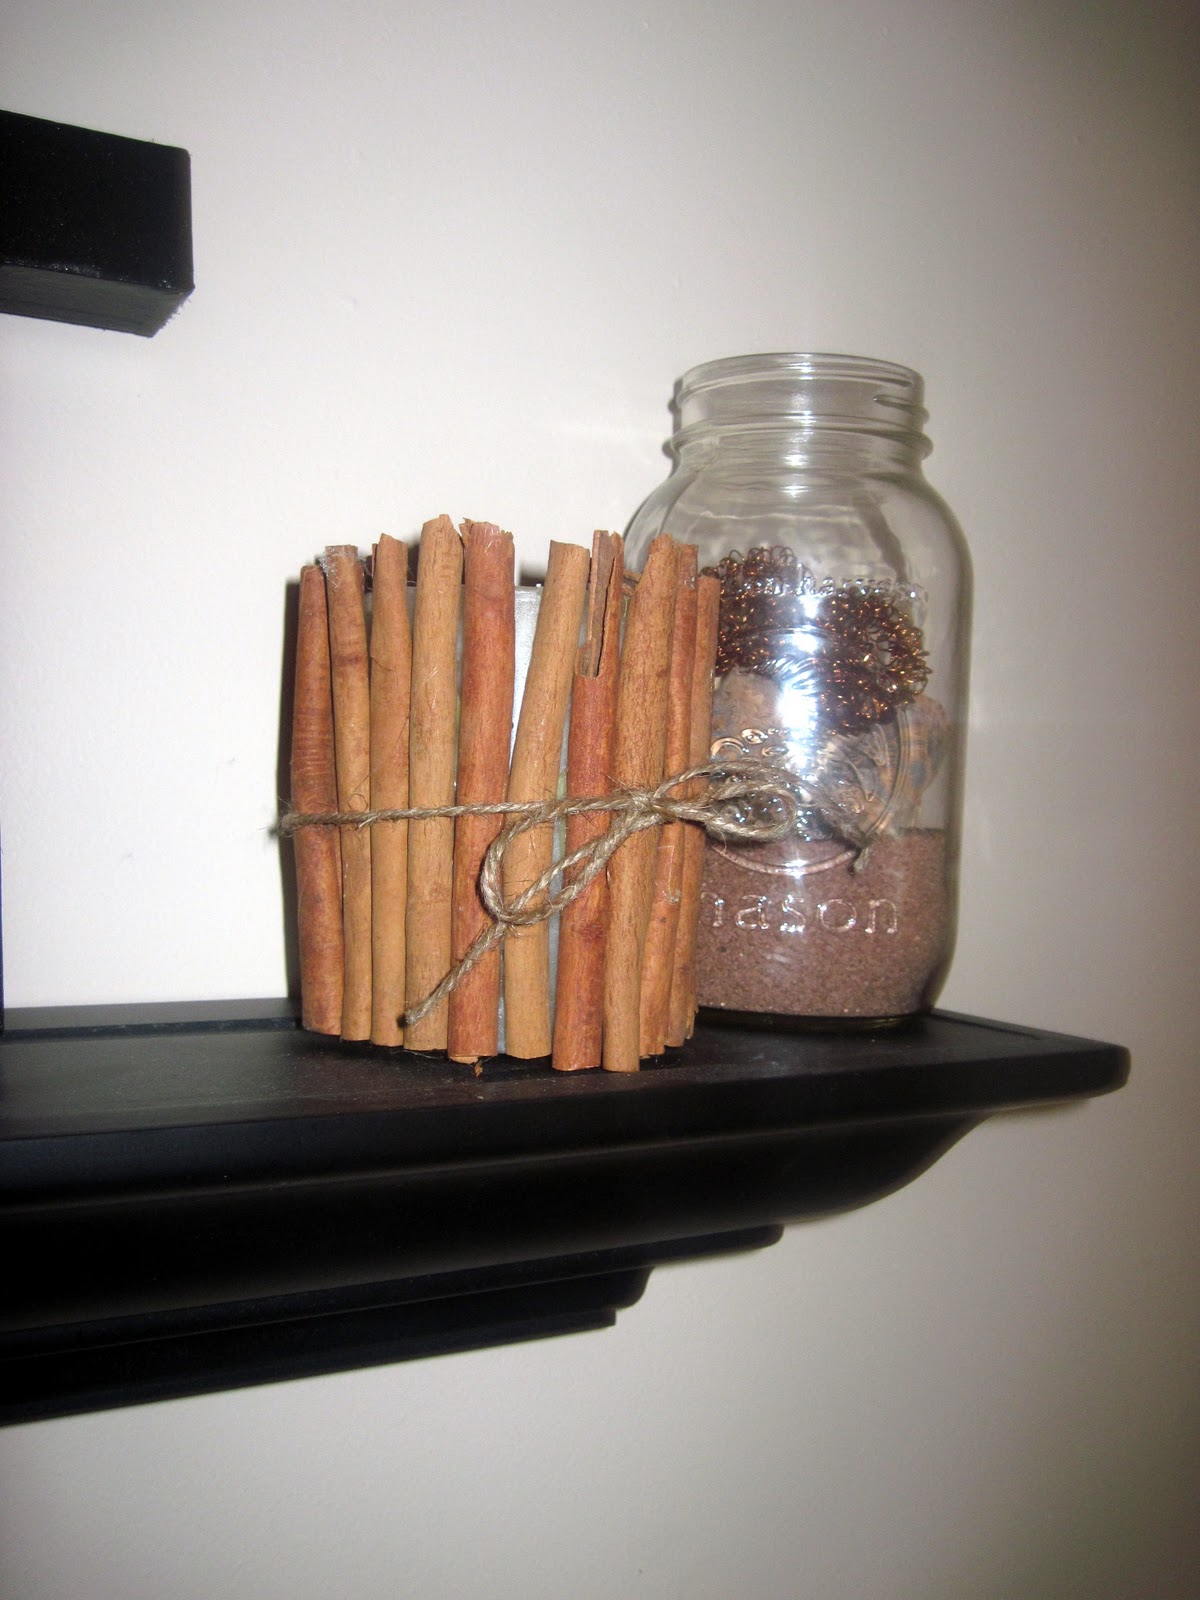
Step 3: Fill the cinnamon sticks all the way around your candle until there are no gaps left.

Step 4:  Wind your twine around the candle 5-6 times to cover the elastic band.

cinnamon-stick-candle-2

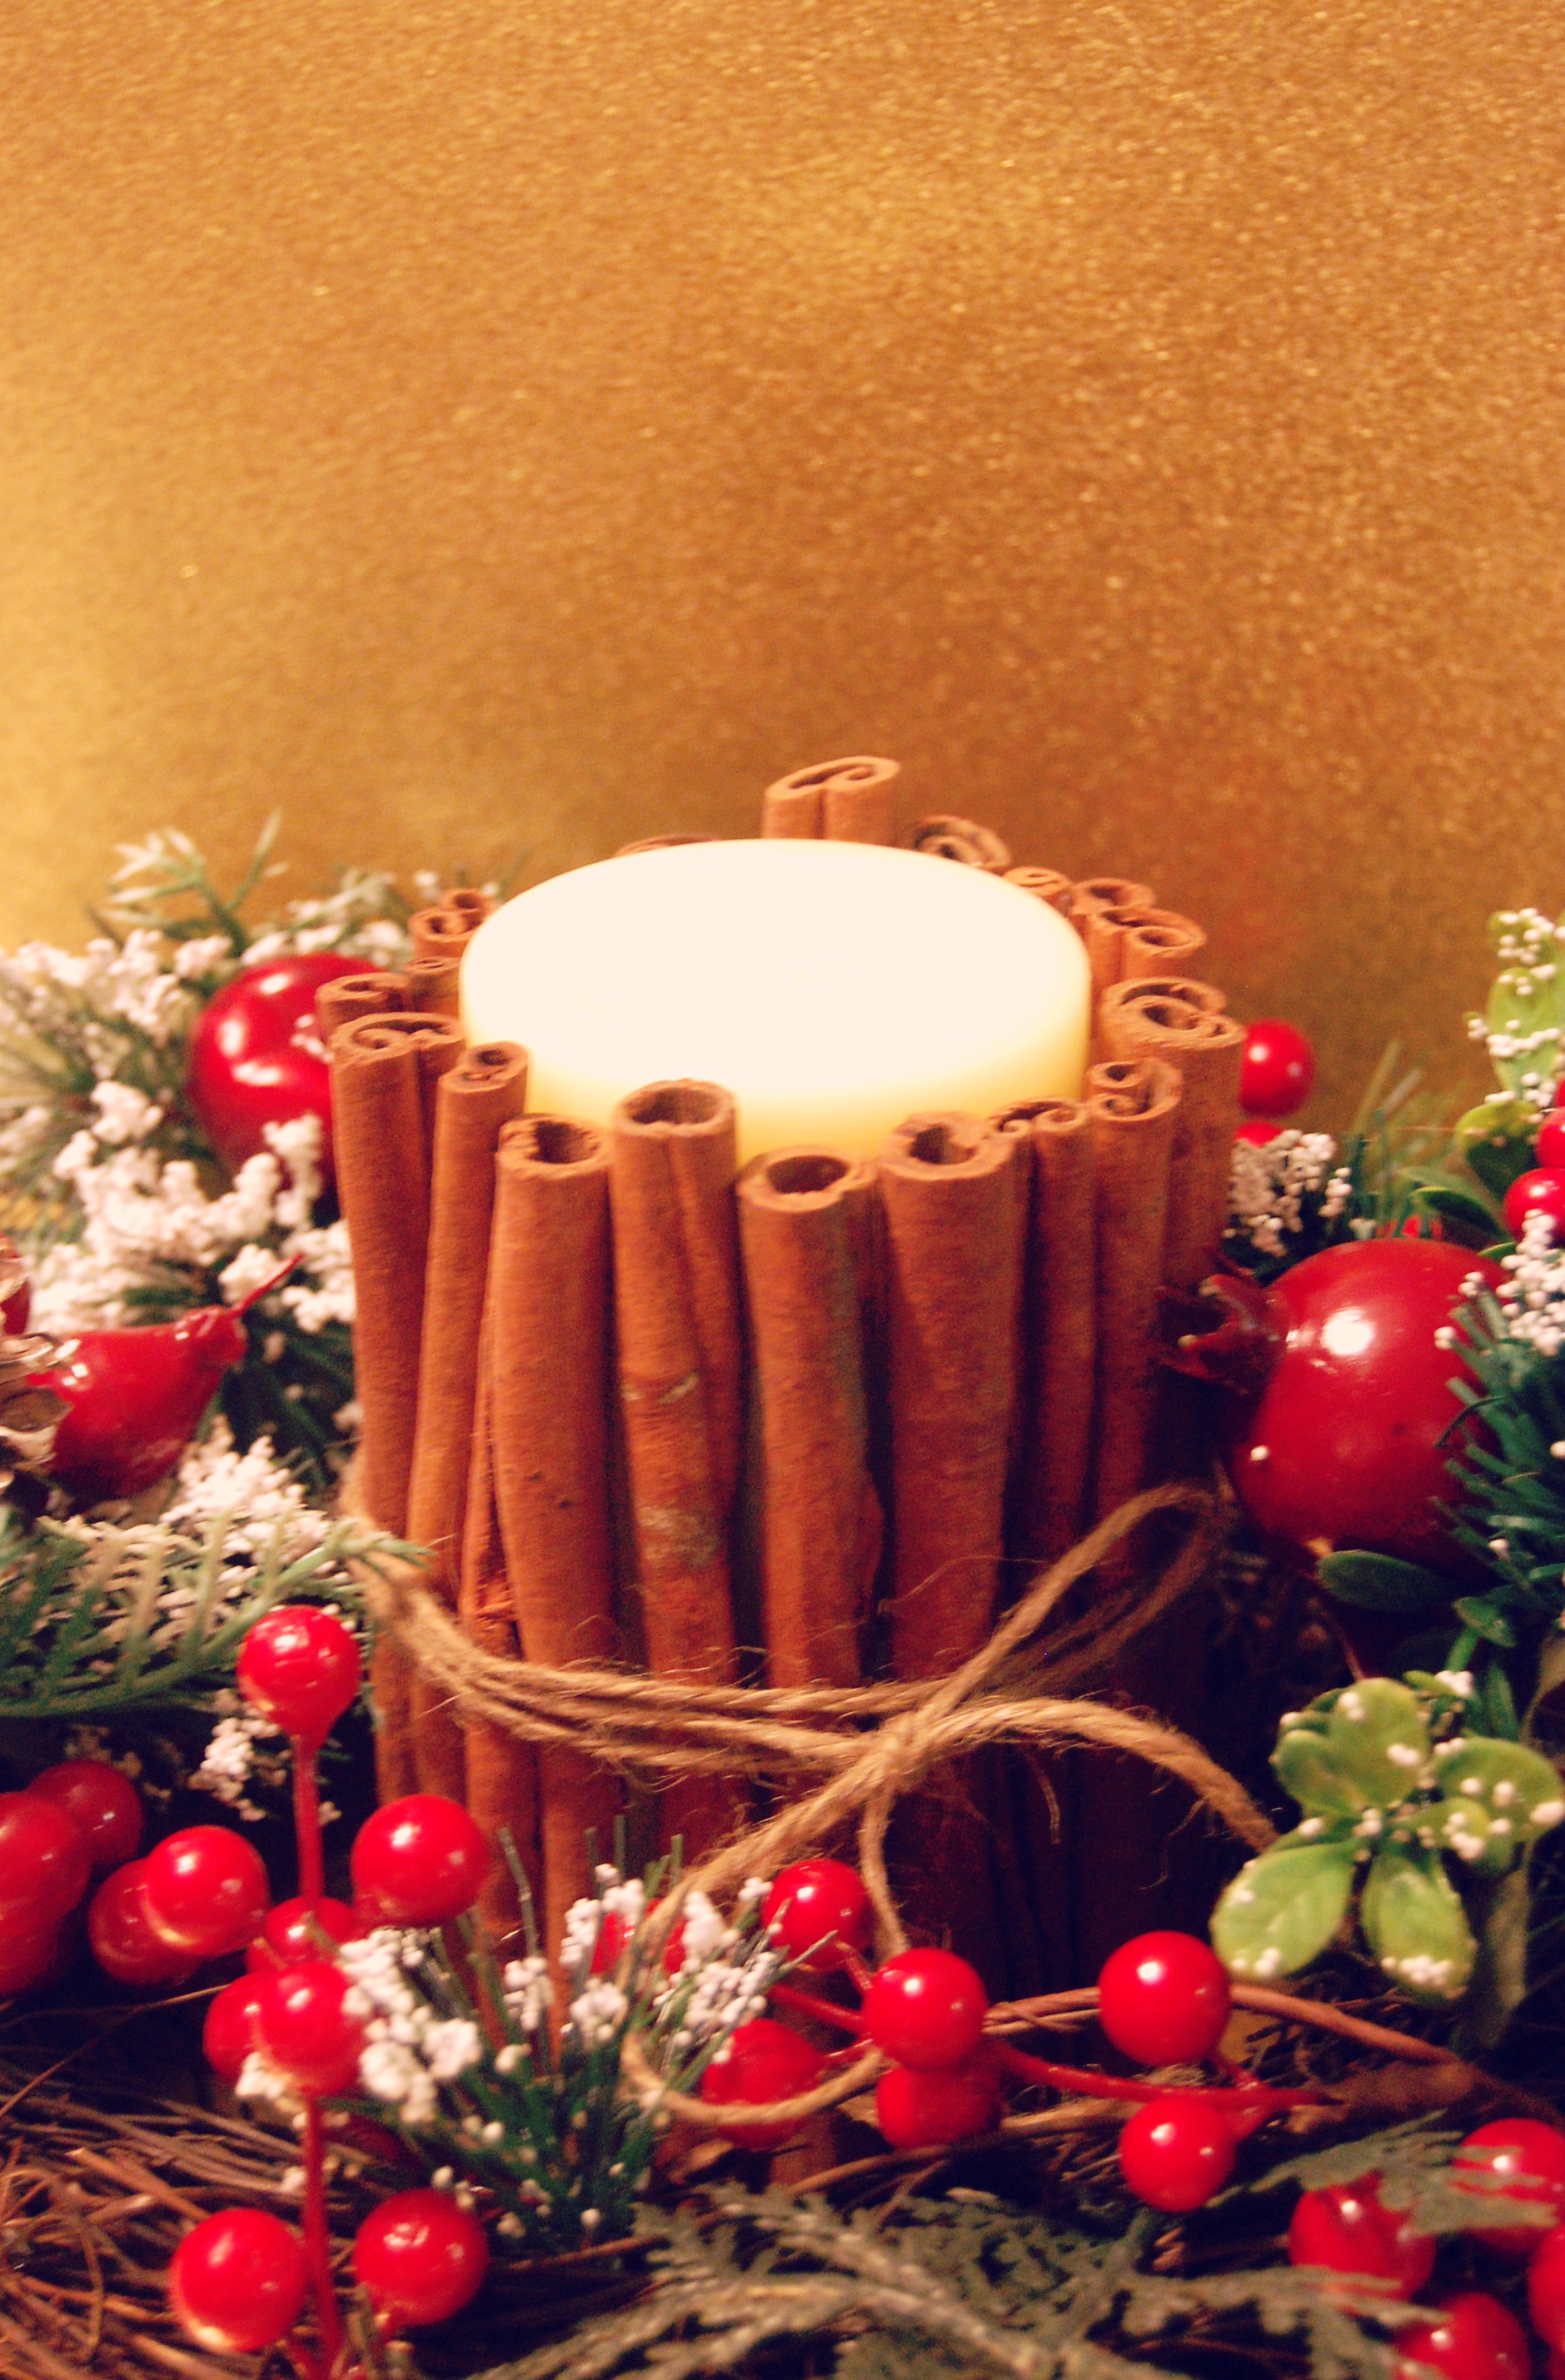
Step 5: Once you have covered the elastic, tie off the ends of the twine in a double knot. Then tuck the knot under the other strands of twine to hide it.

IMG_0781

Step 6: You can leave it with just the twine if you like, but adding a ribbon is a nice touch to polish off the candle. Simply wrap the ribbon around the candle and over the twine, then tie into a bow.

DSC07874

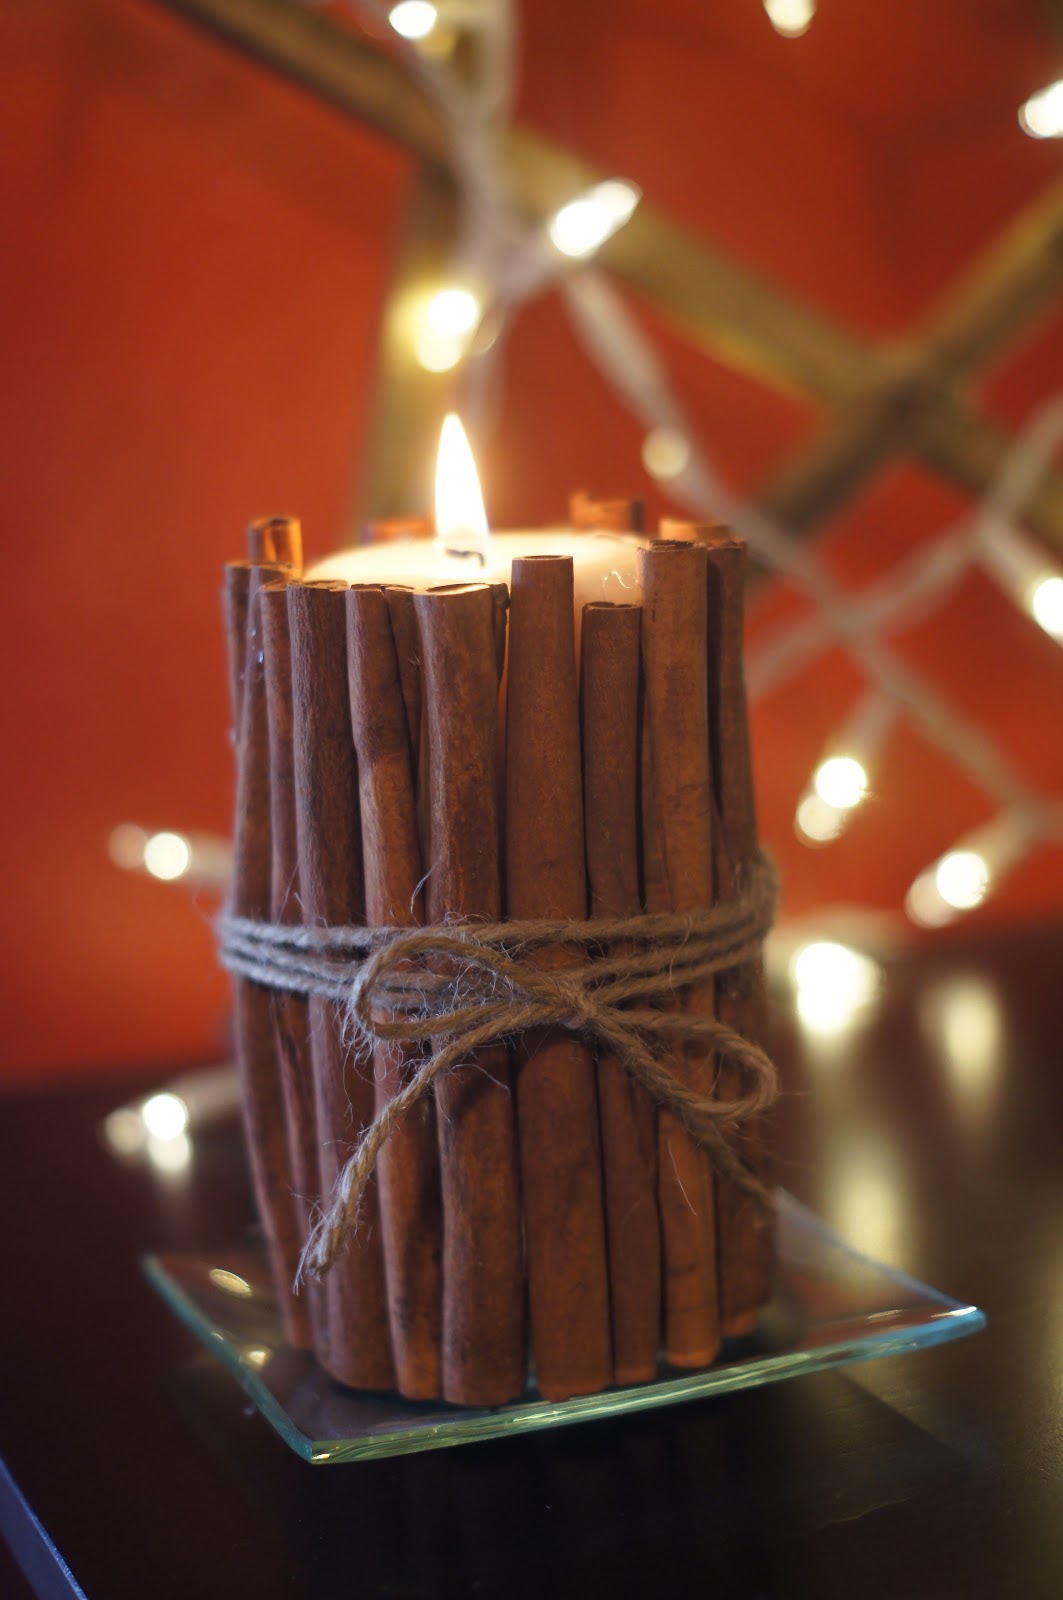
Step 7: Light them up and you’re done!


Comments

comments

5 Curious Candle Containers

Standard


img_3660

Originally, candles were commonly used for illumination and, although we now have electricity, we still keep candles in the house but mainly as decorative features and for mood lighting. Now, with a dash of creativity and imagination, you can make your own candles and their unique but cute candle holders:

1. Mason Jar Candles
Floating candles have a lovely rustic look and they would look great on a table. Simply fill 1/3 of the jar with crystals or marble, add some water on the next 2/3 and drop a floating candle to set the mood. You can also tie around burlap ribbons on the lip of the jar for an extra shabby feel.

quart-blue-ball-mason-jar-with-candle

2. Concrete Candle Holders
Try making some concrete candle holders. It’s much easier than you may think. Make this using cement powder, paper cups, coins, petroleum jelly, sticker tape and disposable containers. Take your larger disposable container and cut the sticker tape to fit around the circumference of the container. You can use petroleum jelly or cooking spray to lubricate the inside of the container. Peel the sticker off, and wrap it around the inside of your container (closer to the bottom of your container).

download

Mix cement and water well with your wooden stick until it’s a smooth paste. The quantity you’ll need depends on the size of the container you want to make your votive out of. Pour / scoop cement into your larger container, until it covers your sticker. Then take your smaller container, and put a couple of coins inside. Push the smaller container into the cement, until the top of it is flush with the top of the cement. Try to keep it centered. Put more coins into the smaller container to weigh it down, until it can stay in place without you holding it. Walk away and leave it to dry for 24 hours.

reusable-concrete-candle-holders-6-1024x1280

3. Concrete Candle Tray
This candle holder can hold 4 candles. It’s basically a block of cement with holes in it large enough to fit candles inside. To make it you need a baking pan, concrete mix and candles. Pour the concrete into the mold and then add the candles, wait for the concrete to solidify, burn out the candles and remove the wax. And now, you have your own concrete candle tray!

DIY-Geometric-Concrete-Candle-Holders-2

4. Wood Votives
This candle holder also has a compact design. It’s a big slice of wood with three large holes in it. In each hole there’s room for a candle votive. Because the candles stay inside the votives, there’s no danger of setting fire to the whole house.

Birch-wood-votive-with-fairy-light

5. Candle Holders from Pipes
A nice accent piece can be a candle holder made of copper pipes. Try combining the pieces in such a way to create a sturdy design with a good base and an interesting shape. Experiment with the shape and once you’re happy with the outcome, insert candle sticks to the pipes and light them up!

Front_Setting_6023


Comments

comments

3 Cool DIY Fruity Ideas For Candles

Standard


6a011570601a80970b0163005345f0970d-800wi

Everybody loves a sweet fruity scent and what better way to incorporate such magnificent fragrance than through scented candles? Here are 3 really cool ideas on how you can incorporate the sweet fragrance of fruits to your candles:

1. Orange Peel Candle
Remove / eat the middle portion of the orange being careful to leave the middle stem-like portion intact. You can remove it easily by using a sharp knife and digging out the middle starting with the edge closest to the outside of the orange. Fill the cavity with any type of oil such as Vegetable or olive oil to just below the center stem-like wick. Light the wick and enjoy the smell!

28-candle-holders

2. Apple Spice Candles
Start by placing the wicks in the jars. You can use the metal wick holders or just tape the wicks to the bottom of the jars. If you use tape just make sure it’s secure. Hot glue will work as well but might re-melt when the hot wax is poured in.

fruittyC-683x1024

Take the tops of the wicks (cut them long) and wrap them around an old pencil and place in the centers of the jars. Melt the beeswax, coconut oil, and apple spice together in a double boiler. You don’t need the wax and oil to boil, just melt. This should only take a few minutes (you may need to stir the wax with some kind of stick or long spoon; chopsticks work well too!) to fully melt the wax and combine it with the coconut oil.

c8b30c0135a293a5e5be56be0e6930d0

This recipe will make enough wax to fill a pint jar and you will need about 1 tablespoon of spices per pint made, depending on the scents you use and how strong you want it to be.

fruit candles table setting

Start by pouring a small amount of wax into the very bottom of the jar and letting it set up (this will help hold the wick at the bottom), then pour the rest of the wax in the jar until it’s full enough. Pour in small layers and let is harden slightly if you have issues with the spices all falling to the bottom. Let the candles sit undisturbed until the wax re-hardens. Then you are ready to burn your candles!

diy-apple-candles-624x939

3. Fruit Floating Candles in a Jar
Gather up some of your favorite scents: mint, lemon, lime, rosemary. Add some water & citronella bug off oil to mason jars. Then add some floating candles. Super easy!

FRT3FU1H01NGCWR.LARGE


Comments

comments

DIY Bug Repellent Candles

Standard


CC2

Bugs come in all shapes and sizes but even if we see them as nuisance, we can’t help but recognize the significance of their role in ecological balance. Good thing is we can get comfortable even without the cost of killing them, a technique we call repelling. An efficient and effective way of repelling bugs is through using scented candles, by which this article will help you make one! Not only will you feel relaxed by the calming aromas, you’ll also get a bug-free and  productive day:

Citronella-3-Low-Rez

To create one, you’ll need the following materials:

  • ½ pound beeswax (1 lb. Raw Settled Beeswax )
  • Rosemary Essential Oil
  • Geranium Essential Oil
  • Lavender Essential Oil
  • Double boiler (or use a pan and a metal bowl)
  • 6 Fluted Dessert Cups
  • Pre-Assembled Tea Light Wicks (Pre-assembled wicks come already primed, i.e. coated in wax. If yours aren’t coated, you’ll need to prime them yourself by dipping them in wax)

IMG_7805

*Note: A woodsy combination of rosemary, geranium and lavender essential oils were known to have insect and mosquito repellant effects.

DSC_0743

1. Using an old knife, cut the half pound beeswax into small pieces. Prepare the double boiler by filling its bottom pan with water while placing the small cut beeswax into the top pan for melting. Heat the boiler at 160 degrees Fahrenheit, using a wax and honey thermometer and then wait until wax melts.

2. When the wax is melted, add several drops of the listed essential oils into the melted wax and mix deliberately. Beeswax has its own distinctive odor, so add more of the oils to achieve a more pungent or strong odor.

CC3

3. The mixture is then ready to be placed in the tart tins, or any vessel that molds the wax during cooling. Fill it to the brink. If you’re using glass molds rather than aluminum molds, start with small amount of wax then cool it a bit, this is to avoid shattering the glass due to high temperature.

4. Allow the wax to cool slightly until the skin starts to form. Add the pre-assembled tea-light wick in the center of each mold so that the wax will smooth out around the wick while the wick hardens.

5. Lastly, let the wax completely harden, trim wick to a height of ¼ inch and;

amp_citronella_IMG_9191

..and voila! You’re done with your Do-It-Yourself Insect Scented Repellant Candles! The candle is estimated to burn for four to six hours so you can use these scented candles for your next outdoor party or activities under the stars.

dscn2674


Comments

comments

Pressed Herbs Candle-Making Ideas

Standard


3d49d1f2f1773293f3ef642112bc27e5

Decorating your space with earthy tones and themes definitely create a relaxing, “Zen” feeling in your home. The best part is, using earthy decorations does not usually cost too much since most of the elements are already found in the environment. One great way to incorporate the earthy theme is using pressed herbs to decorate your plain candles. Not only will they look great, they will leave your room smelling fresh and earthy too! Here are a few project ideas that you can do yourself:


  1. Lavender and Rosemary leaves

Gather a few lavender flowers and rosemary leaves. Melt some paraffin wax and coat the leaves on it. Stick the coated leaves to the inner sides of the candle jar and allow to dry for a bit before pouring in the rest of your wax. Don’t forget to add the wick and let it dry overnight.

how-to-make-an-evergreen-herb-candle-578x1024-a5

  1. Pressed Herb Scented Candles

Infuse fresh herbs in melted wax. Heat the wax to pouring temperature (180°F for most candle waxes), and add strongly scented herbs such as rosemary, lavender, or lemon verbena. Maintain this temperature for about 45 minutes, then strain the wax, which will give off a mild fragrance. Never leave any wax unattended on a stove or other cooker. Soak the wick in a small amount of essential oil before placing it in the mold.


This will give the candle a very mild fragrance when lit. Add a small amount of essential oil to the wax just before it is poured: a few drops for a small candle, no more than 1/4 teaspoon for one pound of wax. Stir well to distribute the oil throughout the wax so that it will not leave spots of discoloration, then immediately pour it into prepared molds.

7158447_evergreen-pressed-evergreen-herb-candles_t975ff8c7

  1. Pressed Herb design Candles

Using dried material (a few seconds in the microwave is all it takes) is important to prevent mildew. Place the leaves close to the candle’s surface so that they may be seen but not close enough to the wick that they can catch fire. Use the following method to anchor them in place. Pour melted wax into the mold. When the outside has set to a thickness of about 1/8 inch, pour the liquid wax back into the container you’re using for the hot wax, leaving just a shell of hardened wax in the mold.

candle-decorating-two-768x1024

Position the leaves where you want them. With a knife or ice pick, cut chunks from wax of the same color and pile them in the center of the mold against the leaves to hold them in place. Fill the mold with melted wax to the desired depth. Using chunks of wax different in color from that of the shell will cause dark or light spots that will show through to the outside. If you have melted all of your wax to color it, you’ll need to let some of it reharden so that you can make chunks of it.

IMG_5434


Comments

comments

Christmas Candles DIY Ideas

Standard


christmas-candle-decoration-ideas-22

With the Holidays just around the corner, everybody’s clamouring for last minute decor shopping and gift-hunting. Luckily, for the creative few, here are DIY Christmas Candle ideas that are perfect for this holiday season:

christmas-decorations-diy-craft-ideas-candles

1. Leafy Candle Votives
To breathe out the Christmas theme into your glass votives, spray some adhesive on to the glass surface and stick pine leaves or any other dried or fresh leaves. Make sure to cover all the way around the bottom for a beautiful finish. Lastly, spray some sealant to the leaves and cut off the extra leaves for a more polished look. Make 2-3 glass votives and this should complete your dining table center piece for Christmas

diy scandinavian mason jar candle for christmas - christmas decoration lights-f66991

2. Shimmery candle holder
Looking for some extra shimmer this Christmas? How about using shimmer on small mason jars to add the extra “bling” on your candles? You can use spray adhesive or brush a coat of liquid or gel glue onto the glass jar. Sprinkle some colourful glitter all the way around and wait for it to dry before completely coating with spray sealant. Another alternative is using double sided tape to create rows of differently-colored glitter, to add the extra dimension in your glass candles.

diy-christmas-decorations-7

3. Cinnamon Stick Candles
Use large, plain white vanilla candles for this project. Cut some cinnamon sticks, a little longer than the height of your candle. Pile the cinnamon sticks upright, all the way around the candle and tie with a beige yarn or burlap ribbon. Not only will it look really rustic, it will also leave a nice scent in your room—perfectly matching the Christmas theme.

2013-christmas-candle-jars-glass-christmas-candle-holders-christmas-table-decorations-f60662

4. Christmas Ornaments candles
You will need Christmas balls and thin candle sticks for this project. Star by dropping small melted wax to the upper surface of the ball and stick the candle to it. Do this step for the next few balls too. You can secure the candle to the ball by adding hot glue on the gaps between the candle and the ball too. So that the candle stays upright, gather the balls in a group and stick them (hot glue or super glue) to an old tray. You can add ribbons to the candles or plastic leaves on the tray, for a more festive appeal.

a8506158195d01189fecc1fa7330fcf0

5. Lacey candles
To add a warm look to plain candles, you can use some old lace as stencil for added pattern. You can either spray paint through the lace or just leave the lace wrapped around the candle. Imagine about 3-4 of these candles grouped together and they will surely add a whimsical feel to your Christmas.

christmas-C


Comments

comments

5 Candle Gift Ideas Anyone Would Love

Standard


Tutorial-for-glueing-vintage-pins-to-candles-or-glass-containers-for-a-unique-gift-idea.-The-Creativity-Exchange

Candles can be the perfect gift to give away, especially during the Holidays. However, store-bought specialty candles may not be the most ideal gifts because they tend to be expensive. With some creativity and dedication, you can make a candle gift set yourself! So, here are 5 Candle gift Ideas that anyone would love to receive this holiday season:

Easy-DIY-Gold-Sharpie-Candle-great-holiday-gift-idea

  1. DIY Floral Candles

Gather some colourful flower petals. Dip a few of the petals to the melted wax and stick the petals to the surface of the glass. Let it cool for a bit and add the rest of the wax. As you reach the top, place a few more petals before pouring the final thin coat of wax to finish. This will give you beautifully colored candles which would look good in a set.

Mid-Levels-Habitat-handmade-wooden-Continental-Iron-Candlestick-romantic-candlelight-dinner-candle-gift-ideas-marriage

  1. DIY Ice Crystal Candle Holder

Pour Epsom salt into a small bowl and add a few drops of food coloring into the bowl. Mix them all together and lay the salt on a clean piece of paper. Spray a good coat of spray adhesive to a mason jar. Roll the jar in the salt spread and make sure to cover as much of the surface as you can. Spray a coat of sealer once you’re done and let it dry thoroughly.

mothers-day-gift-ideas-30

  1. DIY Crystal Candle Holders

Using tacky glue, stick marbles or big crystals around the edges of an old CD. Pile the marbles or crystals upward, still going all the way around the CD, until you reach the desired height. Remember to leave a space at the center of the CD  for the candle. Now, be amazed at your candle’s extra sheen!

Christmas-printable-candle-wrap_zps123b0068

  1. DIY Colorful votives

Use small cut outs of your favourite shapes on colourful Japanese paper. Gently stick these colourful cut outs all the way around the glass surface of the candle votive using mod podge (or a glue-and-water solution). Layer another thin coat of mod podge to seal all the cut outs and let it dry for a few hours before placing the candle.

original_SPR12-015-g

  1. DIY Sea Shell Candles

Clean out the sea shells you collected and add melted paraffin wax, about halfway in depth. Add the wick and let it dry. Trim off the excess wick and make 3-5 more sea shell candles to make a gift set.

Rose1


Comments

comments

Transforming Wine Bottles Into Candles

Standard


christmas-candle-holder-crafts-from-old-wine-bottles-with-ribbons-decor-ideas

For wine lovers, or for those who may have had one too many drinks, you probably have a few empty bottles of wine or alcohol around the house. Instead of throwing them away, you can breathe new life into these bottles by getting crafty with them.
Transforming these wine bottles into candles may be one project you might want to try.
Not only are you making treasures out of what you were about to throw away, you’re also going to end up with really decorative pieces you can use around the house or as a clever gift for a loved one. So, if you’re keen enough to try this project out, here’s how you can easily make wine bottle candles:

repurpose-reuse-old-stuff-29

You will need:

  • 4-5 wine bottles, cleaned and with labels removed
  • String
  • Clear Nail polish
  • Lighter
  • Digital thermometer
  • Two large pots (or double boiler)
  • bottle-stopper-wine-candle-lifestyle

  • Sandpaper
  • Soy wax enough for 4-5 candles
  • Wooden wicks or traditional wicks
  • Adhesive—glue gun, blue-tak or similar
  • Candle Fragrance and candle dye (optional)

76568a69cba8d0bd4b9f6bc7a569294d

  1. Start by coating the string with clear nail polish. Let it dry for a bit.
  2. Tie the string around each of the glass bottles and cut the extra string out
  3. Carefully set the string on fire until the glass is melted through and cut all the way around the string area. Extinguish the flame directly. It is suggested that you do this activity outdoors and far away from highly flammable objects
  4. Once the glass has cooled down, carefully smooth out the cut edges with a sand paper
  5. Use low heat to melt your soy wax in a double boiler
  6. 34784

  7. Once it melts, take the pot off the heat and allow the wax to cool down between (125 to 135 degrees F)
  8. Add in your essential oils or dyes at this stage and stir until you achieved the right fragrance or color hue.
  9. While the soy wax is cooling, prepare your wicks. Wicks usually come with metal tabs to sink through to the bottom of the wax. Center these wicks on the glass bottom and tie the other end of the wicks around wooden skewers for support. You can use hot glue gun of blu-tack to secure the wicks to the bottom as well.
  10. wine-final

  11. Gently pour your melted wax on each glass containers and leave only about ¼ to ½ inch space at the top.
  12. Leave the wax to harden overnight.
  13. Trim the excess wick and decorate the glass containers with ribbons or leaves. Place a few glasses on a tray or a box to make a set and now you have the perfect shabby wine bottle candles to decorate or give away!

original_wine.lamps--1-


Comments

comments

Making DIY Candles in a Mason Jar

Standard


masonjarC

DIY projects with mason jars are in trend nowadays—you can just make a ton or stuff with them! You can even create mason jar candles and they look stylish yet shabby chic. If you’re planning on giving away scented candles as gifts, here’s how you can make one with your mason jar:

candle-pebbles-mason-jar

  1. Tie a wick around the middle of a pen (or wooden skewers)
  2. Let the end of the wick drop towards the center of the bottom of the jar.
  3. mason-jar-candle-ideas.001

  4. You can super glue the base of the wick to the center of the jar so that it stays in place once you begin to pour the wax.
  5. Set your stove burner on its lowest heat setting and place the pouring pot on the burner. You can also use a double boiler for this or just use a regular can for the wax with a larger pot for boiling the water.
  6. Snohomish Modern Photographer

  7. Add the wax flakes to the can and stir constantly until the wax melts without bubbly or simmering.
  8. Pour the scented oil or candle dye of choice on the melted wax flakes until the ultimate shade or scent is achieved.
  9. Stir the mixture until the color and scented oil is fully integrated into the melted wax. It may take about 20 to 30 minutes to achieve this consistency
  10. 6181

  11. Pour into the prepped mason jars and allow it to sit until it cools down, turning solid.
  12. Once cooled down, place the mason jars wherever you need the protected candle light.

Oil-Candle-Lamp-Complete-sq-gardenmatter.com_

Mason jars are ideal for this project because its glass is made to withstand direct heat from the small flame. Set the candles outdoors, like in the beach or on a walkway and they will look wonderful as the sparkle in the dark.

3-Mason-Jar-Strap


Comments

comments

How To Make Tea Cup Candles

Standard


DIYTeacupCandles6

Looking to add some stylish flair to your plain and boring room? Make this cute DIY project that is guaranteed to give a whimsical vibe without over stretching your budget. Here’s how to make cute tea cup candles:

Floral-teacup-candle

What you will need:

  • A few porcelain tea cups (thrift shops are packed with loads of them!)
  • Wax ( soy wax is highly recommended as it burns without smoke but paraffin or beeswax work well too. You can also melt old candles to re use the wax)
  • Wax wicks
  • Wooden skewers
  • img_3342

  • Candle-making dyes and scents or essential oils (optional)
  • Masking tape
  • Double-boiler ( or a can/smaller pot inside a large pot with water in it)
  • Thermometer
  • Oven mitts

DSC_4618

  1. Tape two wooden skewers together at each end for your wick support.
  2. Lay the skewers across the teacup so the wick is centered inside the cup, with the string drawn up straight, perpendicular to the bottom
  3. Melt wax on the smaller pot of your double-boiler on medium high heat. It is suggested to chop of grate ahead the wax to speed up the melting process. If you use paraffin wax, add in some grated or chopped crayon pieces to add color to the candle instead of using a candle dye.
  4. Once the wax has melted, remove the double-boiler from the heat and let it cool for a few minutes. Add your candle dye (if you haven’t yet).
  5. If you’re adding an essential oil, wait until the temperature reaches 180 degrees. If you add the oil while the wax is too hot, it may just be dispersed instead of absorbed into the wax.
  6. Once it has cooled a little, carefully pour it into the prepared tea cups, leaving only ½ of an inch space from the lip of the cup
  7. Allow this to cool completely for about 4-6 hours then trim your wick to about 1 inch in length

teacup-candle

…and voila! You now have beautiful, handmade tea cup candles to decorate your space or give away as gifts!

colage1


Comments

comments